
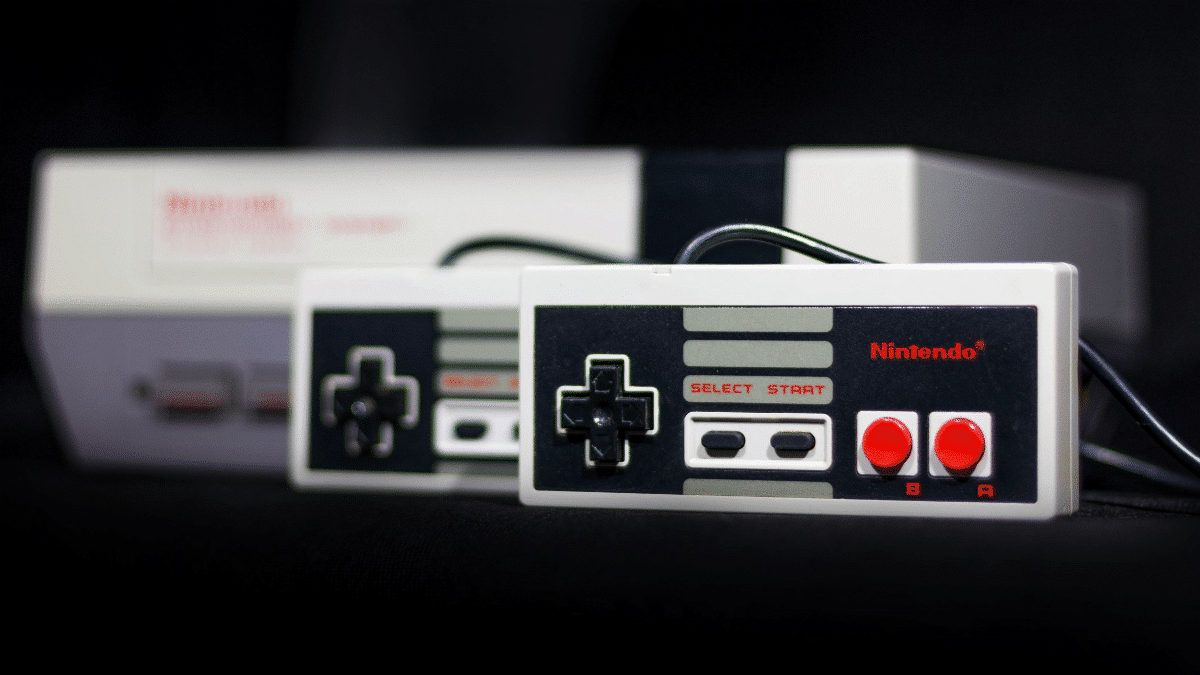
A blinking screen, gray screen, game freeze, failure to boot, or the need to repeatedly insert a cartridge are all familiar frustrations for NES owners. The good news is that many problems come down to dirty or lightly oxidized connector contacts. With a few inexpensive supplies and a careful approach, you can often clean an NES cartridge safely and get it working more reliably again.
This guide walks through safe NES cartridge cleaning for common dust, grime, dirt, and light oxidation. It is not a guaranteed fix. A game that will not load may have internal damage, and the NES console’s 72-pin connector can be just as likely to cause trouble as the cartridge itself.
Quick Answer: Start by gently wiping the exposed cartridge contacts with a lint-free swab lightly dampened with 90% or higher isopropyl alcohol. Let the cartridge dry completely before testing it. If it still does not work, open the shell with a 3.8 mm security bit, inspect the board, and clean the contacts from inside. Avoid water, oils, harsh household cleaners, sandpaper, metal tools, and blowing into the cartridge.
- Difficulty: Easy
- Time: About 10–30 minutes
- Cost: Under $20 in supplies
- Risk: Low with gentle methods
Disclaimer: This guide is for standard plastic Nintendo Entertainment System cartridges. Rare, collectible, damaged, water-exposed, or severely corroded games may need professional restoration. If a cartridge is valuable or sentimental, start with the gentlest method possible or contact a reputable retro-game repair service.
This guide contains affiliate links. As an Amazon Associate, Console Canyon earns from qualifying purchases. Learn more.
Table of Contents
Why NES Cartridges Stop Working
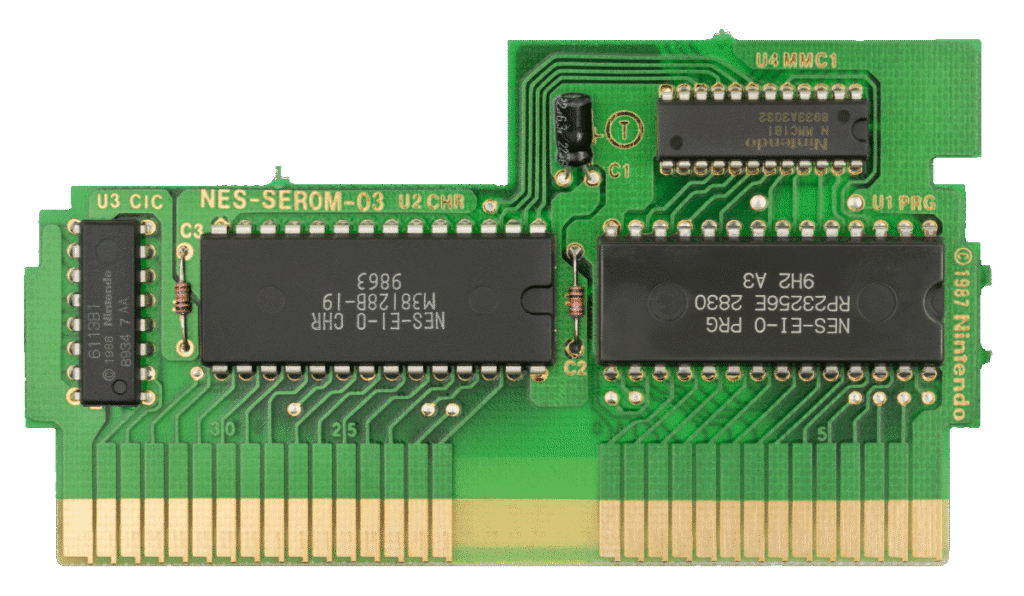
NES cartridges use exposed metal contacts to connect the game’s circuit board to the console. After years of play, handling, moving, and storage, those contacts can pick up enough grime or oxidation to interfere with the connection.
Here are some of the most common reasons an NES cartridge stops working:
- Oxidation: The contacts can develop a dull, dark, or uneven surface after years in storage.
- Dust and debris: Lint, dust, pet hair, and other small particles can block a clean connection.
- Skin oils and grime: Touching the connector edge transfers natural oils and dirt onto the contacts.
- Nicotine residue: Cartridges stored in smoking environments can develop a sticky yellow or brown film.
- Corrosion: Moisture can cause more serious damage, often leaving green, blue, black, or crusty residue.
- Bent or worn contacts: Years of insertion, removal, or improper cleaning can wear down the connector area.
- Damaged circuit boards: Cracked boards, broken solder joints, damaged traces, or battery leakage can stop a game from loading.
- Console connector wear: The NES console’s internal 72-pin connector may be dirty, worn, loose, or misaligned. A clean cartridge can still fail if the console connector is the real issue.
A blinking screen is especially common with front-loading NES consoles. It often means the system is not making a reliable connection with the cartridge, but that does not automatically mean the cartridge is bad.
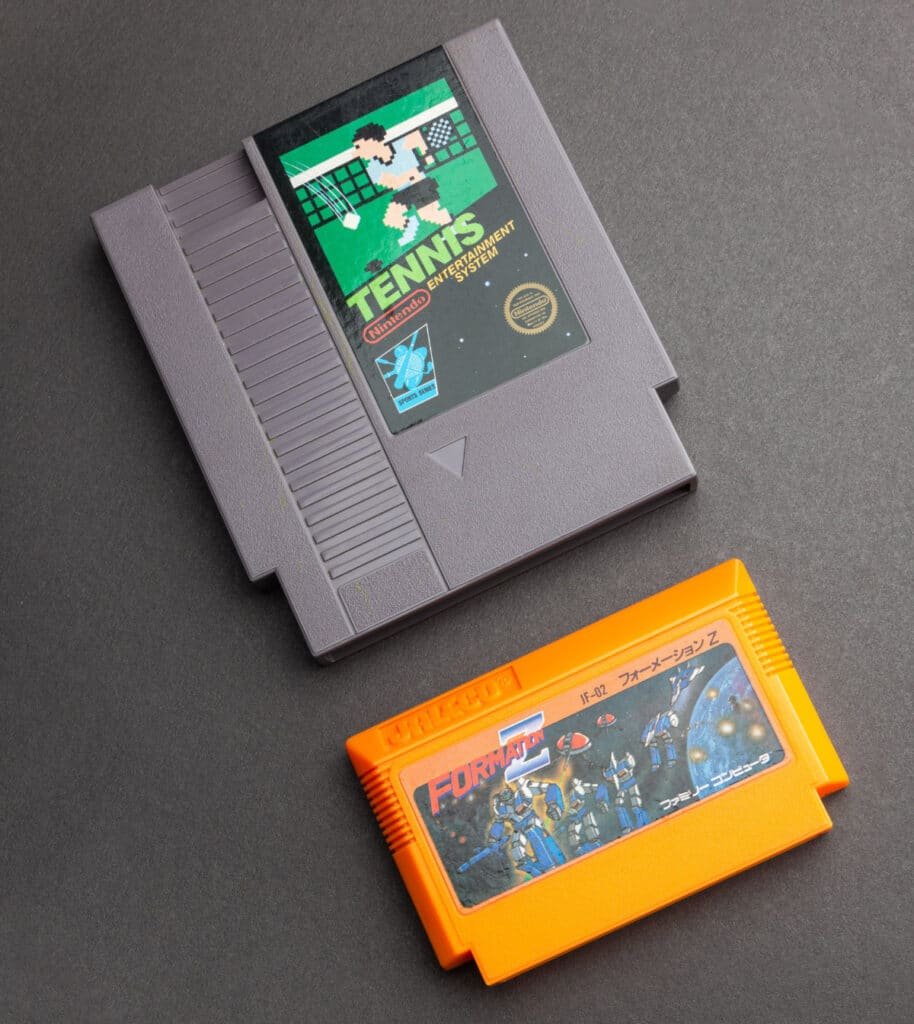
What You Need to Clean an NES Cartridge
Before you start, set up a clean workspace with good lighting. This helps keep dust away from the cartridge and makes it easier to spot corrosion, damaged contacts, or missing screws.
Recommended supplies
- 90% or higher isopropyl alcohol
- Cotton swabs or lint-free foam swabs
- Microfiber cloth
- Nintendo security bit or 3.8 mm game-bit screwdriver
- Soft toothbrush or anti-static brush
- Optional white vinyl eraser, used carefully
- Optional compressed air, used carefully
- Clean workspace and a small container for screws
High-percentage isopropyl alcohol is the best choice because it evaporates quickly and leaves very little moisture behind. Lower-percentage rubbing alcohol contains more water, which is not ideal for old electronics or cartridge contacts.
Do not use
Avoid using products or methods that can leave residue, trap moisture, or wear down the contacts.
- Water
- WD-40 or other oil-based lubricants
- Household cleaners
- Abrasive sandpaper
- Metal tools on the contacts
- Excessive force
- Blowing into the cartridge with your mouth
Blowing into a cartridge can leave behind moisture and saliva. It may seem like it works because you are reseating the game at the same time, but it is not a good cleaning method and can make contact issues worse over time.
How to Clean an NES Cartridge Without Opening It
You do not need to open every cartridge right away. If the game only has light dust, grime, or oxidation, a careful first pass can be enough to improve the connection.
First-pass NES cartridge cleaning
- Turn off and unplug the NES. Never insert or remove cartridges while the console is powered on.
- Inspect the connector edge. Look at the exposed metal contacts along the bottom of the cartridge. They may appear dull, dark, streaked, or dirty.
- Lightly dampen a swab with isopropyl alcohol. The swab should be moist, not dripping. Do not pour alcohol directly into the cartridge opening.
- Clean the exposed contacts gently. Wipe along the connector edge using light, controlled strokes. Replace the swab when it starts to look dirty.
- Clean the outer shell if needed. Use a microfiber cloth with a small amount of alcohol to remove grime from the plastic. Avoid soaking the label, seams, or cartridge opening.
- Let the cartridge dry fully. Give it several minutes in a clean, dry area. Isopropyl alcohol dries quickly, but there is no reason to rush the process.
- Test the game. Insert the cartridge normally and try it in the NES. Avoid forcing it into the console or repeatedly slamming it down.
If the cartridge now works reliably, you probably removed enough surface grime or oxidation to restore a solid connection. If it still fails, works only sometimes, or appears to have debris inside, move on to a deeper cleaning.
How to Open and Deep-Clean an NES Cartridge
Safety note: Opening a cartridge is usually straightforward, but you will be handling an exposed circuit board. Work on a dry surface, preferably away from carpet. Keep food and drinks away, and avoid touching the contacts, chips, and solder joints unless necessary.
Deep cleaning lets you clean the contacts more thoroughly and inspect the board for issues hidden by the plastic shell.
Deep-cleaning instructions
- Remove the screws with the correct security bit. Most standard NES cartridges use 3.8 mm security screws. Keep steady downward pressure on the bit while turning so you do not strip the screws.
- Put the screws in a small container. Keep them together as soon as you remove them. Older screws are easy to lose, and similar screws from other electronics may not fit properly.
- Separate the shell carefully. Once the screws are out, gently lift the cartridge shell apart. If it seems stuck, check that every screw has been removed instead of prying hard with a tool.
- Hold the circuit board by the edges. Try not to touch the contacts, chips, or solder joints. Finger oils can leave residue, and older boards deserve a little extra care.
- Inspect the board. Look for dust, insect debris, corrosion, cracked solder joints, damaged traces, or discoloration. Green or blue residue, white crust, blackened areas, and broken copper lines are signs that the cartridge may need more than a basic cleaning.
- Clean the connector contacts with isopropyl alcohol. Lightly dampen a lint-free foam swab or clean cotton swab with 90% or higher isopropyl alcohol. Gently wipe both sides of the connector contacts.
- Brush away dust and loose debris. Use a soft toothbrush or anti-static brush with light strokes. Brush debris away from the board instead of pressing it into the components. If you use compressed air, hold the can upright and use short bursts.
- Use a white vinyl eraser only for stubborn oxidation. If the contacts still look dull after alcohol cleaning, rub them lightly with a clean white vinyl eraser. Use minimal pressure and only a few passes. You are trying to lift surface oxidation, not grind down the contact plating.
- Clean the contacts again with alcohol. Use a fresh swab and alcohol to remove eraser residue. Do not leave eraser particles on the contacts or circuit board.
- Let every part dry completely. Make sure the board, shell, and connector edge are all dry before putting the cartridge back together. Never put a damp cartridge into the NES.
- Reassemble without overtightening. Align the board and shell carefully, then reinstall the screws until they are snug. Do not tighten them excessively, since old plastic threads can crack or strip.
This method can help restore old NES games that have built up years of dust, grime, and light oxidation. It will not repair a broken circuit trace, failed chip, or serious corrosion, but it can help reveal whether a larger problem exists.
How to Deal With Corrosion on NES Cartridge Contacts
Not every dark or dull contact needs aggressive cleaning. Light oxidation usually looks like a dull or uneven film. Serious corrosion is more likely to look crusty, pitted, green, blue, black, or flaky.
Light oxidation
For mild oxidation, take a conservative approach:
- Start with 90% or higher isopropyl alcohol and a lint-free swab.
- Use gentle strokes instead of hard scrubbing.
- Try a white vinyl eraser only if alcohol alone does not improve the contacts.
- Wipe away all eraser residue with alcohol.
- Allow the cartridge to dry fully before testing it.
Serious corrosion
Stop and inspect the cartridge more carefully if you see green or blue buildup, flaking metal, blackened contacts, battery leakage, damaged copper traces, or corrosion that has spread across the board.
Do not scrape the contacts with metal picks, grind them with sandpaper, or use harsh chemicals. Those methods can remove the thin conductive plating from the contacts and create permanent damage.
A cartridge with battery leakage, severe corrosion, or damaged traces may need repair from a retro-game technician. For a rare, valuable, or sentimental game, professional evaluation is usually the safest choice.
Common NES Cartridge Cleaning Mistakes
A lot of cartridge damage comes from cleaning methods that are too aggressive or leave behind moisture and residue.
- Blowing into cartridges: This adds moisture and saliva instead of removing grime.
- Using low-percentage rubbing alcohol: More water means slower drying and a greater chance of moisture exposure.
- Inserting a wet cartridge into the console: Even a small amount of leftover moisture can cause trouble at the connector.
- Scrubbing contacts too hard: Heavy pressure can scratch or wear away the contact plating.
- Using pencil erasers or sandpaper aggressively: Pencil erasers leave residue, and sandpaper can permanently damage the connector surface.
- Ignoring the NES console’s 72-pin connector: A clean cartridge can still fail if the console’s connector is dirty, worn, or misaligned.
- Mixing up or losing screws: Keep them in a small container and avoid overtightening them during reassembly.
The best approach is patient and gradual. Start with gentle alcohol cleaning, test the result, and only move to deeper work if the issue continues.
If the Cartridge Still Does Not Work
If cleaning does not solve the problem, use a few simple tests before assuming the game has failed.
- Test the game in another compatible NES console if possible.
- Test a known-working game in the same console.
- Clean the console’s 72-pin connector, or have it replaced if it is worn or loose.
- Inspect the game board for visible damage.
- Consider whether a failed battery backup is affecting saved games.
- Contact a reputable retro-game repair service for rare or valuable games.
Testing multiple cartridges can help narrow down the problem. If several known-working games blink, fail to load, or freeze in one console, the issue is probably in the NES itself, often the 72-pin connector or another internal component.
If one cartridge fails in multiple consoles after it has been cleaned, the cartridge may have an internal board-level problem rather than dirty contacts.
How to Store NES Games to Prevent Future Problems
Once you get a cartridge working again, good storage habits can help keep it in better shape.
- Store games in a dry room with stable temperatures.
- Use protective sleeves, dust covers, or individual cartridge cases.
- Avoid garages, damp basements, hot attics, sheds, and places with dramatic temperature swings.
- Keep labels dry and avoid applying cleaner directly to them.
- Handle cartridges by the plastic shell instead of the connector edge.
- Put games back in their cases or on a shelf after playing rather than leaving them around food, drinks, pets, smoke, or open windows.
- Check your collection from time to time for dust, moisture exposure, or battery leakage in games with save features.
A stable indoor environment is one of the simplest ways to reduce oxidation, shell discoloration, label damage, and recurring contact problems.
FAQ
Can I use rubbing alcohol to clean an NES cartridge?
Yes. Use 90% or higher isopropyl alcohol if you can. Put a small amount on a lint-free swab or cotton swab, wipe the contacts gently, and let the cartridge dry fully before testing it.
Why does my NES game work only after several tries?
A game that works only after repeated attempts usually has an inconsistent connection. Dirty contacts, light oxidation, a worn NES 72-pin connector, or problems with the console’s cartridge mechanism can all contribute.
Is it safe to use an eraser on cartridge contacts?
A clean white vinyl eraser can be safe when used gently on light surface oxidation. Avoid hard rubbing, use only a few passes, and always follow up with isopropyl alcohol to remove the eraser residue.
Can cleaning fix a blinking NES game?
It can. Cleaning may fix a blinking NES game when dirt or oxidation is preventing a solid connection. However, a blinking screen can also come from the console’s 72-pin connector or another hardware issue, so cleaning the cartridge is not always the full solution.
Should I blow into an NES cartridge?
No. Blowing into a cartridge adds moisture and saliva residue. It is better to clean the contacts using high-percentage isopropyl alcohol and a lint-free swab.
Clean Carefully and Store Smartly
A careful cleaning can often bring an old NES game back from problems like gray screens, freezing, blinking, or intermittent loading. Start with a gentle alcohol cleaning, open the cartridge only when necessary, and stay away from harsh chemicals or abrasive methods that can damage old contacts.
If the game still does not work, remember that the cartridge may not be the only issue. Test other games, inspect the NES console’s 72-pin connector, and consider professional help for severe corrosion, battery leakage, visible board damage, or games with real collector value.
With a little patience, careful cleaning, and proper storage, many original NES games can stay playable for years to come.